Welcome to Creative Cloud! To get started, simply download your first trial app from the Adobe website.
The Adobe Creative Cloud desktop app—which you’ll use to manage future app downloads—will be installed at the same time. Trials begin on the day each app is installed.
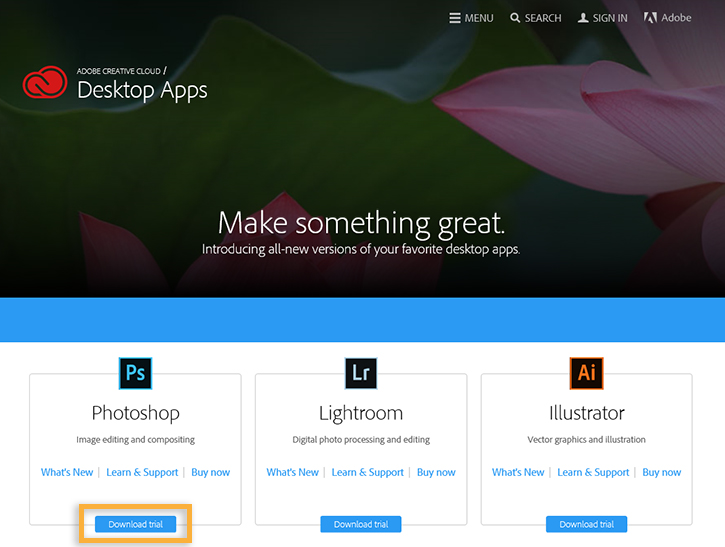
- Go to the Creative Cloud apps catalog. Find an app that you want to download, such as Photoshop, and click Download trial.
 Note:To ensure a successful download, follow these suggestions before you download a trial app:
- Make sure you have administrative privileges for the account you’re using (Windows | Mac OS).
- Use the latest version of Internet Explorer (Windows), Firefox (Windows or Mac OS), Chrome (Windows or Mac OS), or Safari (Mac OS).
- Disable pop-up blockers in your browser. See your browser's help for instructions.
- Turn off firewall and third-party security software if they conflict with the download (Windows | Mac OS).
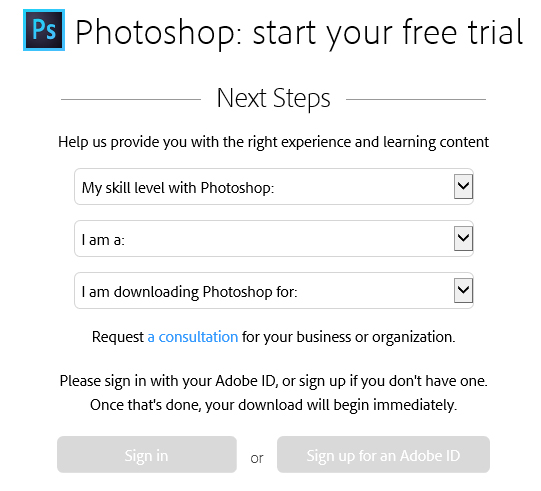
Note:If you have a paid subscription to Creative Cloud, see Creative Cloud download and install instructions.Don't have a Creative Cloud membership or trial yet? See Get started with Creative Cloud. - Your app begins to download. At the same time, the Creative Cloud desktop app will appear, and it will manage the rest of the installation process. Check your download progress in the status bar next to the app’s name.Note:Depending on your network’s speed, it could take some time to download your app.
- Your app is installed and launched automatically. Your trial also starts at the same time.You can also launch your new app the same way you launch any app on your computer. Your new app is installed in the same location where your applications are normally installed, such as the Program Files folder (Windows) or the Applications folder (Mac OS).Note:Having trouble with your first download? See Creative Cloud download and installation troubleshooting.Note:By default, when you install a new Creative Cloud app, it will remove the previous versions of the app on your computer. If you want to keep your previous versions installed, click Advanced Options and deselect the Remove old versions check-box in the update confirmation dialog box.You can choose to have multiple versions of the same app running simultaneously on your computer—with the exception of Adobe Acrobat. An Adobe Acrobat XI or Acrobat DC installation will uninstall any previous version of Acrobat.
- To convert your trial to a full membership at any time, see Convert a trial to a paid Creative Cloud membership.The Buy Now button appears next to the product name in the Creative Cloud desktop app. To purchase a Creative Cloud membership, click Buy Now and follow the onscreen instructions.
Once you’ve downloaded your first app, you can use the Creative Cloud desktop app to easily browse, install, launch, and manage any Creative Cloud app or service.
- Click the Creative Cloud icon
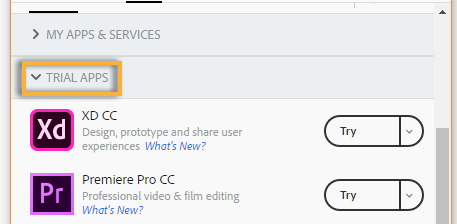
 , located in the taskbar (Windows) or Apple menu bar (Mac OS), to open the Creative Cloud desktop app. If it’s not already selected, click the Apps tab at the top of the window.You will see your installed trial app, as well as a list of other apps you can browse and try.Note:If you don’t see the Creative Cloud icon, you may have quit the Creative Cloud desktop application. To relaunch it:
- Windows: Choose Start > Programs > Adobe Creative Cloud.
- Mac OS: Choose Go > Applications > Adobe Creative Cloud > Adobe Creative Cloud.
Note:To download the Creative Cloud desktop app manually, visit the Creative Cloud desktop app page. - To launch your new app, click the application’s Start Trial button in the Apps panel.You can also launch your new app the same way you launch any app on your computer. Your new app is installed in the same location where your applications are normally installed, such as the Program Files folder (Windows) or the Applications folder (Mac OS).
 Note:By default, when you install a new Creative Cloud app, it will remove the previous versions of the app on your computer. If you want to keep your previous versions installed, click Advanced Options and deselect the Remove old versions check-box in the update confirmation dialog box.You can choose to have multiple versions of the same app running simultaneously on your computer—except for Adobe Acrobat. An Adobe Acrobat XI or Acrobat DC installation will uninstall any previous version of Adobe Acrobat.
 - To convert your trial to a full membership at any time, see Convert a trial to a paid Creative Cloud membership.The Buy Now button appears next to the product name in the Creative Cloud desktop app. To purchase a Creative Cloud membership, click Buy Now and follow the onscreen instructions.


0 comments:
Post a Comment